TM 5-3895-374-24-2
onto the beam from the end of the beam.
3) Fix the stopper onto the beam surely.
(3) In case the trolley cannot be put onto the beam from the open end of the beam
as it is connected to the hoist.
Installation of the trolley, as assembled with an electric chain hoist, to the beam
by separating the side plates G and S is extremely dangerous and should not
be employed under any circumstances. Always install the trolley to the beamand
connect the chain hoist to the trolley.
1)
Remove the connecting shaft from the chain hoist and separate the chain hoist
from the trolley. (Leave the top hook on the suspension shaft.)
2) Install the trolley to the ream.
(1) Remove from the suspension shaft the shaft stopper pin, side plate S,
spacers and top hook.
(2) Mount the trolley wheels of the side plate G on the beam flange.
Assemble the spacers, top hook spacers, and side plate S onto the
suspension shaft. Pushing the side plate S. mount the trolley wheels
of the side plate S onto the beam flange.
(3) Insert the shaft stopper pin into the suspension shaft and secure the
former with a snap pin.
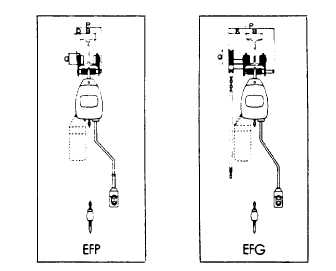
(4) Connect the electric chain hoist to the trolley by making sure of its
relative position to the trolley. (See figures below.)
(4) When all mounting work is over.
When all the mounting work is over, check the following.
1) Make sure that the relation of the position of the trolley
to that of the electric hoist is proper. (Refer to figure)
2) Make sure that the stopper for prevention of the derailing
of the trolley is surely fixed on the beam.
3) Make sure that all the bolts, nuts and split pins are where
they should be and are surely tightened.
(page 3 - 885)