TM 5-3895-374-24-1
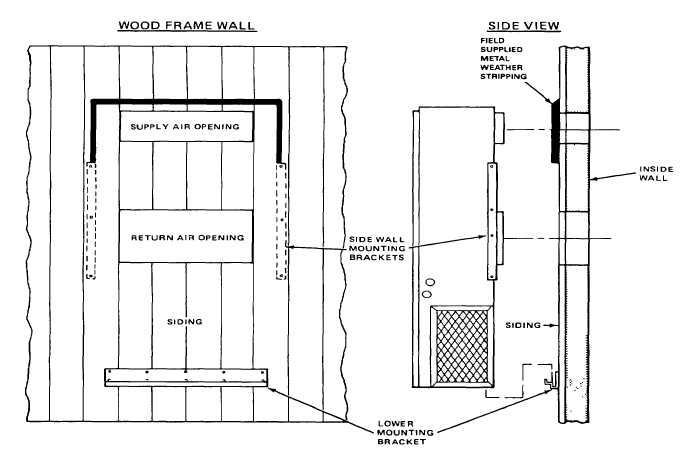
MOUNTING THE UNIT ON WOOD FRAME WALLS
1 Units are secured to the outside wall surface with
mounting brackets supplied There are brackets for both
sides and the bottom of the unit (Refer to table on Page
4, for dimensions to locate mounting brackets)
2 Locate and cut out discharge and return air openings
Frame in discharge and return air openings between wall
studs Framing for the bottom bracket should be
sufficiently strong to support the weight of the unit
3. Install the side wall mounting brackets on both sides of
the unit prior to Installing it
CAUTION
Use the holes provided in the air conditioner casing only.
Do not drill any additional holes in the unit casing as the
sealed refrigerant system may be accidentally pierced.
4. Secure lower mounting bracket to wall with 3/8" lag
bolts.
5 Lift unit over lip of lower mounting bracket and secure
It to the wall with 3/8" lag bolts through side mounting
bracket holes The weight of the unit should be supported
by the bottom bracket.
6 After mounting the unit on the wall, Install metal
weather stripping at top and sides of unit to insure a
water tight seal.
NOTE. Ducts through the walls must be insulated and all
joints taped or sealed to prevent air or moisture from
entering the wall cavity
Some installations may not require any return air duct It
is recommended that on this type of installation that a
filter grille be located in the wall Fitters must be of
sufficient size to allow a maximum of 400 FPM.
(Applicable installation codes may limit an unducted
return air installation to a single story residence only)
(page 3-487)